Wednesday, May 26, 2010

What's new at The Loft - Episode 25

TOO HOT!!!

I know I shouldn't complain, but it's already too hot here in Florida.  I really don't care for the heat and humidity of Florida, but I'd rather have that then living up north again during winter.  So we endure what we must, but that doesn't mean I don't have the right to complain about it.  As I am writing this (at 11:50 am) it's currently 84 degrees, but feels like 87 degrees, with 65% humidity.  Today's high temp is supposed to reach 92 degrees.  Goodbye spring, hello air conditioning!

Weekends are a time when most of us part time creative type people with a "real world" job get most of our fun stuff done.  At least that's the theory anyway!  I wish I could say my life works that way but for me its not even close.  With the undertaking of the ATC 3.6.5. Challenge, I find I have almost no time during the week to work on any other projects, which leaves me hopeful that on the weekend I can make up for lost time and get to my projects.  Sadly that doesn't really happen either.  Weekends I usually end up running errands or doing my supply shopping for a project, which for me takes entirely too long.  I have too much of a tendancy to browse and wander .  This especially creates a problem when I go grocery shopping as I have a bad habit of putting the frozen foods in my cart first. 

Procrastination and perfectionism and follow through are my other very bad habits.  I get really good ideas but getting started on them for me is the equivalent of a mental block at times.  And then once I do start on something getting it finished it becomes the next chore, as I spend so much time trying to get it just right that I tend to leave a lot of half completed projects lying around, to which my husband can attest to.  I have so many mini books started in the numerous classes I've taken in the last 2 years class, but almost none of them are completed.  One of my other goals for this year is to try and actually complete some of these. 
Home projects of course fit into this as well.  For those of you that read my blog regularly, you may remember that some months back we were working on Daughter #1's room redecoration project.  As of the last blog post on the subject, which was back in early March, we had finished the painting and were ready to move into the fun part of the redecoration, namely the new furniture and bling to complete the transformation, but sadly the project came to a standstill to search for a new bed and furniture.

Hubby then declared we couldn't start any new home projects until we finished the Daughter #1's room, which has left us in limbo for a while.  We are in serious need of some weeding and shrub maintenance in our backyard  and I really wanted to repaint the kitchen.  Landscaping for us is a job we tend to procrastinate over, since it generally means a really big job.  We re-landscaped the entire front and backyard several years ago and were very happy with the results, but sadly we have neglected it and it's turned into a gangly mess. 
Plus did I mention I really don't care for the heat!  So the new around the house projects once again have been put on hold.

I'm happy to report thought that we did make some progress on Daughter #1's room though, as her new bed has arrived and her room has been put back together, now only the new furniture has to be picked out and the rest of the decoration can begin.

ATC 3.6.5. Challenge

5/6 "Lover Boy" - What can I say I love recoloring black and white photos of silent movie stars.  I find it's one of my go to inspirations for cards when I'm tired or lacking in inspiration from other sources.  For this card I started with a mixed media type paper given as a free sample from Somerset Studio's magazine.  The photo is of Rudolph Valentino and Agnes Ayres from "The Sheik".  For this card I recolored the card using my Stencil Collection chalk pastels and my watercolor wheel watercolor paints.  I added a little extra bling by glueing some purple rhinestones to the Sheik's necklace and printed the title on my computer at home and loosely cut it out and inked the edges with Tsukineko chalk ink in turquoise.

5/7 "Follow Your Bliss" - The main inspiration for Today's card was MOTW - "Made on the Way" as I knew I wouldn't not have time in the evening to make my card so I made one on my lunch break with materials I found around my office.  I cut the background from a political commentary magazine I had in my desk and adhered it to the card.  I then used my white Uniball pen to hand draw the heart and decorate one side.  I also used a black Zig marker and a red Pentel pilot pen I had on my desk to ebellish the heart more.  I cut the title from a back issue of Cloth Paper Scissors magazine I  had in my purse.

5/8 "The Things We Do For Love"  I started today's card by cutting a piece of paper that looked like old parchment for the background.  Next I cut the image of the couple on the bike from my Tweety Jill "Vintage Photographs" collage pack.  I adhered the photo to the card at an angle for more visual interest.  I then found this Rub-on from KC &  Company and affixed it over both the photography and background.  The title was cut from some Theresa Collins paper.


5/9 "Mother's Day" - Not to be selfish but I sacrificed a little art so I could enjoy the day with my family.  So I made a simple card to honor all mom's, since there is nothing like a mother's love.  The background was cut from stock parchment looking paper, and the image was from the Tweety Jill's "Vintage Photographs" collage pack.  I added a stamp at the bottom and some clear backed letter stickers to the side.  Not the most of artistic of cards, but conveys the message I wanted to send.


5/10 "Love U"  For those who saw my last post you may recognize this Prima paintable paper that I used to make a Mother's Day card for my mom.  I love this paper which is textured like a heavier stock watercolor paper, and as the name conveys, it really does hold up well to paint.  I painted the card using Neo II watercolor paints, Liquitex "Basics" acrylic paint, Zig markers, and a white Uniball pen.  For the title I simply made small boxes around the letters for the title Love U that are printed on the paper.


5/11 "Can You See Who I Really Am" - My inspiration for todays card came from my Grafitti Chic class I've been taking with Alisa Burke.  For the lesson I was reviewing that day Alisa taught us how to make handmade stencils from photographs.  I found a photo on the internet and cut my stencil.  I then cut a background from a free sample of paper I got in a Sommerset Studios magazine and adhered it to the background.  I then placed the stencil on the background and using Tsukineko chalk ink in black, dabbed and smeared the ink on until I filled in all the cut out areas on the stencil.  I then hand wrote the title in a black Zig marker.  For those of you who are good with faces the photograph that I used to cut the stencil was one of Jessica Alba.


5/12 "Tres Chic" - My inspiration for today's card was a dress mask I cut a long time ago for a birthday card I made.  I kept the mask thinking I would use it again at some point.  I started the card by choosing a background with some text in it and laying down some yellow paint from my Adirondack paint dabbers  Once dried I used the dress mask to cover an area of yellow, and using a red Adirondack paint dabber covered the yellow area not hidden by the mask.  Once the red was dry I used a black zig marker to outline the dress.  From some scrap paper (manufacturer unknown) I cut the title, and little pink flowers.  I added some bling to the flowers in the form of purple rhinestones, and glued all of this down next to the dress.  Lastly using a black Zig marker I doodled some designs on the card.


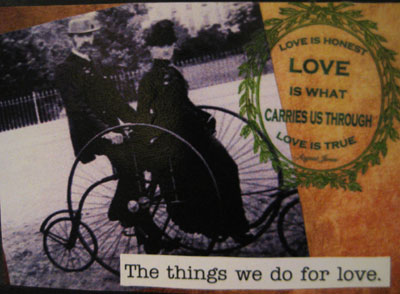
5/13 "The Pirates Treasure"  Thanks to Johnny Depp, who doesn't like a pirate!.  The Tampa Bay Scrapbook Treasure Hunt is a big deal every year here, and one local scrapbook store "Scraporium" knows how to do the event up right, complete with their very own Captain Jack Sparrow.  As a thank you to the participants of the hunt and their regular shoppers (myself included) they offered a pirate themed make and take.  Sadly I didn't have time to do the make and take at the store so I took my kit home and promptly forgot about it until I was going through some of my stash the other day and found it.  I can't really tell you about the manufacturers of the items in the card, as it was a premade kit, but I can tell you that I distressed the red paper with a sanding block before gluing it down to the back, and that I used a black Zig maker to make the map, and used a gold metalic Gelly Roll pen to highlight the treasure chest. Sorry I don't have more information on this one.


Well that's all I have for today.   Please feel free to leave your comments and don't forget to come back soon.  Thanks for stopping by!


Tuesday, May 18, 2010

What's new at The Loft - Episode 24

Mother's Day

My wonderful family chose to surprise me for Mother's Day on the Friday before this year, and it couldn't have come at a better time.  I had been working very hard making my first quilt top and was so happy when I finished it and thought I had done a good job on it, only to find that the whole quilt top was off center.  And not just a little off, but VERY off center. Talk about a slam to my self esteem!    I was so upset over it that I left my Friday Night Crafters group and went home to sulk.  However I was greeted when I walked in the door by my girls who were happy to see me and a husband anxious to give me my Mother's Day present.  To my surprise my wonderful family presented me with a new iPad.  They gave it to me early so I would have the whole weekend free to play with it.  It is so awesome, and been having lots of fun getting familiar with it.  Of course the first app I had to download was Netflix.  Anyone who knows me, knows how much I love Netflix, especially the instant play option, so it's really cool that I can carry it with me and watch it anywhere...well anywhere with a WiFi connection that is.

On Sunday for Mother's Day we went out and had dinner with my Mom, and I gave her a card I made for her.  The paper was a Prima paintable paper which I painted with Neo II watercolor crayons, Liquitex "Basic" acrylic paint, Zig markers and a white Uniball pen.


ATC 3.6.5. Challenge

I cannot believe we are in May already, it's crazy to me how quick the year is going by.  The school year is almost over and pretty soonest my first born will be starting high school, and my baby will be starting second grade.  Of course on the flip side I can tell how far into the year we are because my ATC stack keeps growing.  But at least my posts are in the current month again.

5/1 - "Our Love Story" -  For a long time I have wanted to make a book type ATC, so when I remembered that I had these small grunge board hinges inspiration was born.  To do this I used 2 base cards and used a paper strip to create a hinge linking the two cards in book form.  Then I used a brown leather looking paper to cover the front.  Next I cut a small square from a parchment looking paper and used a small circle punch to use as a inverted corner rounder.  I inked the edges of with walnut distress ink an glued it to the front cover.  I cut the title out of some Theresa Collins paper, and inked the edges and glued down to the center of the title tag. I then turned my attention to the hinges which I embossed with rust colored embossing powder, but I wasn't happy with the results as the color was too close to the color of the cover and it didn't have the aged look I was going for.  So I went back and  lightly inked up the hinges with black Staz On ink and when they were dry I glued them on the left side of the front cover at the top and bottom, then distressed the edges with a distressing tool, lightly sanded the top, and smeared Tsukineko chalk ink in Gingerbread. and edged the cover in walnut distress ink.


For the inside I covered the cards with  paper that looked like tea stained lace.  I had planned on using a black and white image of my husband and I from our wedding day, and had it put to the side, but try as I did I couldn't find it, so I had to go with a photo taken from my Tweety Jill "Vintage Photographs" collage pack.  Lastly I cut all the text from the same Theresa Collins paper.


5/2 - "By The Shore" - My inspiration for today was from a product that I have had in my craft stash call Glazed Dimension from The Stencil Collection, the company that makes the pastel chalks I use all the time.  I have had these for a long time but have only used them a few times. Glazed Dimensions work like a pen writer release a colored gel type substance that creates a raised stained glass look.  I've used these on black and white photographs in the past with neat results so when looking through my Tweety Jill collage packs I thought the effect may work nicely on this beach picture I found in the "Fashion" collage pack.   I started first however by spreading a little Mudd Puddles "Malibu" textured sand at the bottom of the card.  Mudd Puddles in my opinion was a little messy to use, and I was upset to discover that even though I screwed the cap on tightly it still dried out on me, so what you see here is what I was able to chip out of the dried container.  I put some Tombow 2 way glue where I wanted the sand to go and pressed the card into the grains until I had decent coverage.  Next using a turquoise  Glazed  Dimension pen colored in the water, then added a white Uniball pen line, which was smeared with my finger to give an illusion of white caps.  I used the same turquoise Glazed Dimensions pen to make very thin lines to the blue in the sky for added dimension, highlighting certain areas with a white Uniball pen as well.

5/3 - "Parisian Lady" -  I was feeling very french today so my card was made by starting with a background cut from a french toille paper (sorry manufacturer unknown) which was then inked over with pink and purple Color Box "Cat's Eye" ink.  Next I used an imperfect stamp technique to stamp the image of the Eiffel Tower in the background (Stamp by Tim Holtz).  I then detail cut the image of the woman from my Tweety Jill's "Ladies in Hats" collage pack and adhered her to the card.  To make the flowers in her hair I I cut a thin strip of pink tissue paper, and then a slightly wider strip of white tissue paper and first wrapped and crinkled the pink paper, then did the same with the white, making sure the white paper made a larger "bloom".  I then glued the pink to the center of the white flower with some Tombow 2 way glue.

5/4 - "Rock and Roll "   The inspiration for this card was a found item, namely the red guitar that I found in my front yard. It appeared to be part of a broken keychain.  I wanted the guitar more realistic so I used some white thread and a small piece of toothpick I painted black to create the strings.  To start the card I stamped a flourish design in black ink and let it dry.  I then used a red Neo II watercolor crayon to color the background and once dried I heavily sanded the background to distress it.  I then stamped the bannered heart with black ink on top of the distressed watercolor.  I then used red barn Tsukineko chalk ink and imperfectly stamped the small area of sheet music at the top of the card and the bottom of the card.  I then added some musical notes in black ink on top of the sheet music.  Using Tombow metal glue I glued the guitar so that it was centered in the middle of the banner.  Lastly I used my small wooden alpha stamp set to add rock to the left side of the banner, and roll to the right side of the banner.


5/5 - "Adorable" The portrait of this woman from my Tweety Jill "Fashion" collage pack served as my inspiration today. I then teamed it with some pink paper from KC & Company that I cut for the background. I loved the sort of batiked flowers on the paper, but dressed it up further by adding some highlights with a white Uniball pen. The detail cut of the woman's image was added on top, to which I added some additional detail with the white Uniball pen to the feathers in her hair. From another page in the KC & Company paper pack, I closely cut the title and adhered it the card going up the side. How I love my white Uniball pen for I could not help myself and added some white dots to the A in the title.


Well this is all I have today, can't wait to share more with you for my creative juices have really been flowing lately and some cute cards have resulted. I hope you have liked what you have seen. Comments are always welcome so please feel free to drop me a line and let me know what you think. Thanks for stopping by and come back soon!


Thursday, May 6, 2010

What's new at The Loft - Episode 23

SORRY FOR THE ABSENCE OF LATE

I know it's been a while since I have posted on the ATC 3.6.5. Challenge, and I apologize.  My day job has been very stressful as of late, which for the most part has made me tired and lazy at night.  So after work, making dinner, helping the girls with their homework, and then make my ATC for the day I've been pretty much doing nothing else.  Well that's not completely true, but close enough.  As hard as it's been to get anything else accomplished I have still been able to make my ATC card every day.

TAMPA BAY SCRAPBOOKING GUILD

We had another great Guild meeting on April 27, which featured photographer Joe Roberts, who gave a fantastic and informative talk on camera settings, what they mean and how to use them. 

ATC 3.6.5. Challenge

4/19 - "And Away We Went" - I was looking through a back issue of "Artful Blogger" magazine and came across this lovely fall picture.  There was something about the colors, and the way the trees formed this natural arch that made me want to use it.  So with this as the inspiration for my background I went in search of what else I could put in it without drawing attention away from the color.  Luckily I found this black and white image of the man and woman in the old car among the Tweety Jill :"Vintage Photographs" collage pack.  I detail cut out the picture and adhered it to the background with some pop up dots.  I then added the title using some word stickers I had laying around.

4/20 - Springtime Graffiti - I have been taking this great class from Alisa Burke called "Graffiti Chic" and decided to use some of her techniques as the inspiration for today's card.  The card was made by using various acrylic craft paints in spring colors and applied in layers using several methods and combined with some stamps.  I was making large canvas versions of this using the same techniques for class and thought it would be fun to do one as an ATC. You can click on the link above to read more about Alisa.  I'm always inspired when I read her blog.


4/21 - "Dreaming of Italy" - I find this to be another example of what went wrong, and I can tell you it was pretty much giving in to exhaustion.  I found the image used for the background in a magazine and was the source of my inspiration for the card
I loved the architecture of the buildings but I was not fond of the color scheme, so I started by using a white Adirondack paint dabber and using a light dry brush approach tried to diffuse some of the brightness of the color without losing all of it.  I then detail cut the image of the woman from my Tweety Jill "Fashion" collage pack.  The exhaustion set in though and by this point in the day all I wanted to do was finish the card so I hand wrote the title.  Unfortunately my best efforts do not come when I'm tired, and I can't begin to tell you how much I hate my own handwriting sometimes.


4/22 "Carolena" -  For those of you that have been following my blog for awhile you know that one of my favorite things to do is to print out black and white photos of silent movie stars on a laser printer and recolor them.  Today was no exception, except at the time I recolored this one I couldn't remember which actress this was which is why it's name Carolena.  However I went back and researched it and this is actually Mary Pickford.  The card was recolored using my Neo II watercolor crayons, along with some Stencil Collection pastel chalks, and highlighted using a Clear Star Gelly Roll pen.


4/23 " Marie at the Party" - While looking through an issue of Cloth, Paper Scissors during my lunch break, I came across this great picture of Marie Antoinette, which immediately inspired me to make my card while eating my lunch.  I don't usually carry supplies for making cards with me but on this particular day my craft tote which usually houses my loom knitting supplies (yes I'm a lunchtime loom knitter) also happened to have a few craft supplies in it, so I was able to make most of my card at work.  I started by detail cutting the image of Marie Antoinette out.  Then while looking through a political magazine we had in the office I found this great background image.  I love the sunburst look, and if you look real close you can see it's the Capitol building in the background.  I then printed out the text and glued it on the side next to the image.  After this was all done however I thought the card still looked a little plain and felt it needed some detail enhancement.  Using a white Uniball pen I added some detail to the dress, and using a Clear Star Gelly Roll pen, dressed up the hair adornment.  I then used a black Zig marker to add faux stitched lines to the word blocks.

4/24 - "You Make My Heart Smile" - I loved this quilted looking element to this patterned paper and is served as my inspiration for my card today.  I cut the patterned paper so that I captured what I wanted to be the main focus of the card - namely the large pink, and medium blue heart.  From the same paper I cut a small pink heart and a mini red heart.  Even though the background paper already conveyed some depth with the quilted look of the flowers I wanted to add more with the smaller hearts, so I adhered them with pop up dots.  Once I had that done however I felt that something was missing on the left side of the card, so I came across this classic picture of Audrey Hepburn from Breakfast at Tiffany's.  Lastly I added the title block which I stole from a wedding themed dimensional embellishment, which was adhered with pop up dots.


4/25/ - "Delicate Flowers"  I saw a design similar to this in a magazine which inspired me to create my own version of the piece.  I started by cutting a card from watercolor paper.  I like to use watercolor paper, especially on cards I will be painting to keep the warping to a minimum.  Using a Neo II watercolor crayon in a darker green I colored the card then added water to move the color around.  After the card dried I then stamped the card with a large text stamp in black ink. After this ink dried I stamped the card again using a flower stamp.  The next step was to paint, but before I could I needed to be sure everything was thoroughly dry so I gave the card a good blast with my heat tool for good measure.  Once I was confident that I could apply the paint without any moisture dilution, I began to paint using my Liquitex "Basics" acrylic paints to color in the flowers and add some detail.


4/26 - "Find Your Style" the main inspiration for my card today was two things, the artist paper used as a background I received in a issue of Somerset Studio magazine, and the image of the woman found in an ad at the back of the magazine which I detail cut out and adhered to the background.  I love how the black and white photo both compliments and contrasts on many levels against the paper used for the background.  The crayon scribble type look of the lines on the background vs the clean lines of the image, the bold red and hint of gold color in the back vs the gray tones of the image. I love teaming the messy with the refined!  I finished the card off with some letter stickers that I smudged some Color Box "Cats Eye" red ink on.


4/27 "Curiouser and Curiouser"   My card today was actually what I like to call a "made along the way" type card.  Although technically I wasn't traveling anywhere, I had to make my card at work during my lunch break because I knew I would be getting home very late, and would most likely be too tired to make a card then.  The basic premise to the MATW card is to only have a few supplies and make the card with items found where ever you are.  In this case the only supplies I had was a card blank a glue stick and a white Uniball pen. Strangely enough while looking through a political magazine in the office I came across this large Alice in Wonderland image, which I cut down, and pieced together in parts.  The title was cut from another page in the magazine which seemed to fit with the theme of the image.  I then added some white dots with the Uniball pen to add a little embellishment.

4/28 - "Never Be Afraid to Be Yourself"   My inspiration for this card was a piece of mixed media art that I saw and then reinterpreted here.  I started with a magazine image of a woman's head that was diffused with white paint dry brushed on lightly so as to minimize the original image but not lose all of the detail.  I next hand drew on a hat, and outlined the details of the image in pencil.  I'm not a good freehand drawer so I redid this many many times before I was even slightly happy with it. Next I went in with my Liquitex "Basics" acrylic paints and painted in the background, and then switching to a smaller brush painted some of the detail.  Once the paint was dry I used a white Uniball pen to add embellishment and draw the flowers on the hat. The flowers were then given a splash of color with a pink metallic Gelly Roll pen.  After everything was dry I hand wrote the title.  I can't tell you how much I hate my own handwriting sometimes which is why when I don't do a lot of journaling in my scrapbook pages.

4/29 "Sorrow"  I was planning on using this picture I found on the Internet in an altered art piece but due to it's small size I thought it would make a nice ATC instead, but rather than use my normal pastel chalks or watercolors for this I chose instead to use oil pastels.  I don't have a fancy oil pastel set but rather a cheap craft store brand.  I was going for a more dramatic effect which is why I kept the skin tone very muted and added the bright color to the lips.  I added a little embellishment to the eyelashes though by using a white Uniball gel pen.


4/30 "Wicked"  While looking through a mixed media magazine I loved the combination of using printed text with a black and white image, so I ventured to create my own collage piece doing just that.  I started with a background cut from my daily scrapbooking calendar.  I then found a black and white image of the girl from my Tweety Jill's "Vintage Photographs" collage pack and detail cut it and glued it down to the background.  Next I punched the hat out of a some Tweety Jill collage text paper.  I then free hand cut the brim out of some brown polka dotted paper.  For a final bit of color I used some Tsukineko chalk ink in Red Barn to edge the card.


Well we've made it up to the end of April, and hopefully with the next posting we will be close if not all the way up to date in presenting my cards.

I hope you have enjoyed what you have seen.  Please feel free to drop me a line and let me know what you think.  Comments are always welcome.  Thanks for stopping by, I hope you come back soon.