Showing posts with label Susan Tuttle. Show all posts

Wednesday, March 28, 2012

What's new at The Loft - Episode 110

Toy Camera Class Photos


A toy camera refers to a simple, inexpensive film camera.  However despite the nickname these camera are actually fully functional cameras but with limitations.  Generally these camera's have plastic bodies and more importantly use simple plastic lenses and have no mechanical parts. Film advancement and winding is done by a manual dial.  Because these cameras were crude they were considered toys and generally given to children and typically became prizes at fairs, amusement parks or parades.

Once the digital age began to revolutionize photography these cameras were all but forgotten, but die hard fans of these relics, which were known for unpredictable and interesting optical effects, began to slowly build a following.  The 1990's began to see the emergence of a whole new generation of enthusiasts for what is now known as "lomography" or "lo-fi photography". 

The traditional toy camera used 120 film, instead of the 35 mm film which eventually became the standard film format.  As a child I remember having an old Kodak camera with a drop in 120 film cartridge, and a plug in flash bulb strip.  However today's most popular toy cameras are the Diana and the Holga (shown below) and both now come with variations which include multiple lens formats, changeable plastic lenses, adjustable exposure frame areas (which can double the number of photos taken on a single roll) color filters, adjustable depth of field, reusable flash and can take 35 mm film. 

The Diana

The Holga


I myself have a Diana Mini camera which is smaller in size than the regular Diana.  And while the Diana Mini doesn't have the ability to change lenses, it does take 35 mm film instead of 120 mm film which is a plus for me as it is difficult to find a place to develop 120 mm film.  To take advantage of the changeable plastic lens look though I did buy some Diana plastic lenses with an adaptor to fit my Canon DSLR camera.

The Diana lenses for my DSLR take fun pictures but they do not give you quite the same interesting results that an actual toy camera in all it's imperfection can.  That's why I was very excited when I heard that Susan Tuttle would be teaching a 4 week long workshop on replicating toy camera effects using Photoshop.  The class consisted of 10 different techniques recreated in Photoshop that are commonly found in images taken with toy cameras.  I have taken many of Susan's classes in the past and I highly recommend them if you are looking to expand your knowledge of Photoshop or Photoshop Elements beyond basic editing.  This class did not disappoint as it was fun and informative, and I can't wait to see what I can do with a mix of the techniques I've learned and the different cameras and accessories I have (iphone here I come).

Below I've shared some of  my photo's that I submitted for comment on the techniques we learned in class. 


The Diana Effect

Diana images are characteristically fuzzy and without much contrast and heavy vignetting. 


 Faux Polaroid

Polaroid instant cameras were known for generally having interesting skews on color and a more vintage feel to images.   


The Pinhole Effect

I actually built a pinhole camera when I was in 5th grade.  My pictures then didn't come out so great, but the technique was interesting to learn in Photoshop.


Silver Gelatin

This is actually refers more to a process used in old black and while film maufacture rather than film development, whereby a suspension of light sensative silver salts in gelatin is coated onto film.  Under this method, film could be processed even many years after their manufacture and exposure which was different from wet-plate process which needed to be exposed and developed immediately

Fisheye Effect

Have I ever mentioned how much I like my fisheye lens for my iPhone.  It's nice to know how to do it without a lens too.


Holga Effect

Holga cameras and their filters are known for wild color variations, and slightly vignetted images.


Cross Processing

Cross processing is more related to the chemicals used to develop old film than anything to do with the camera itself, but Photoshop can give you similar results.

 
Expired Polaroid

Using old Polaroid film often produced interesting results.  A little know fact is that film sold as "lomography" film today at the Lomography store online or at Urban Outfitters for the Diana and Holga cameras are really nothing more than old expired film, which generally sells for higher prices.   


Light Leak Effect

 Light leaks were common with old plastic bodied cameras which gave images a warmer softer feel.


Double Exposure

I think of the most fun things you can do with a toy camera is double or multiple exposures on the same frame. Of course the one below was "created" in Photoshop and not a true double exposure shot, I have done plenty of them in the past with an old Canon 35mm camera, and has always been one of my favorite techniques.


I hope you have enjoyed today's post.  As always comments are always welcome so feel free to drop me a line and let me know what you think.  Thanks for stopping by and come back soon.


Monday, February 6, 2012

What's new at The Loft - Episode 108


I CAN'T WAIT!!!

I am so excited about Susan Tuttle's new workshop, Toy Camera with Photoshop.  I have taken several classes with Susan and they are so informative and detailed that true beginners need not fret.  All of her lessons are stepped out and easy to follow, and come complete with not only written instructions but video tutorials.  Susan's classes are so informative and inspirational that you won't be disappointed.  I am already signed up and as the title says it all, I CAN'T WAIT!

AND BEST OF ALL!!!   SUSAN IS HAVING AN ONLINE GIVEAWAY TO WIN A FREESPOT IN HER NEW WORKSHOP.  Click HERE to learn more.


Replicating toy camera + film processing effects -- polaroid, pinhole, diana, fish eye, silver gelatin, cross processing, holga, expired polaroid film, light leaks, and double exposure

Instructor: Susan Tuttle

NOTE: It is not necessary to have taken any of my previous Photoshop workshops prior to taking this workshop.

Format: stepped-out instructions, screenshots and video tutorials (clear video of the projects being carried out on the screen, with audio).  The class is not given in a live format, so you can sign in and work on the projects at any time that is convenient for you during the duration of the workshop.

Software: The projects are taught with Photoshop Elements 9.0 (PSE 9.0) -- earlier versions of the program and the most recent 10.0 will work just fine, as the tools and functions used in the projects are the classic, tried-and-true ones. I provide supplemental written instructions for Photoshop/CS versions. If you have an earlier version of Elements or a Photoshop/Photoshop CS version, your screen will look different from my screenshots, but you will be able to carry out the projects in your program if you have a basic knowledge of your program's tools and functions and are able to navigate your program with ease. Note: You can get a free 30 day trial of the latest version of Photoshop Elements at http://www.adobe.com/

Length of Workshop: 4 weeks (plus an additional 2 weeks of comp time to access the site if you need it)

Workshop Dates: March 1 - March 29, 2012 The workshop site will open Thursday, March 1st. at 9 A.M. EST.

Level: This course is designed for both beginners (who have a basic understanding of the tools and functions of Photoshop Elements and/or Photoshop/CS) and the more seasoned folks who wish to learn how to digitally replicate toy camera and film processing effects.
(NOTE:EARLYBIRD REGISTRATION goes from Wednesday, February 1st. at 10 A.M. EST until Wednesday, February 8th. at 10 A.M. EST. REGULAR REGISTRATION goes from Wednesday, February 8th. at 10:01 A.M. EST up until March 1st. when the class begins.)

Fee: EARLYBIRD FEE IS $119 USD REGISTER EARLY AND SAVE!
REGULAR FEE IS $129 USD


Hope to see you in the workshop forum!  Thanks for stopping by and come back soon.

Monday, April 4, 2011

What's new at The Loft - Episode 86

Hey Everyone,


Just wanted to share some new photo projects I did for Susan Tuttle's Photo Manipulation 3 class.


Technique:  Adding a zoom blur


Technique: Soft light


Technique:  Digital collage with hand painted look


Technique: Turning a photo into modern art


Technique: Creating a low horizon and exansive sky


Technique: Simulating the look of black and white film


Technique: Simulating a cross process effect


Technique: Converting to monochromatic sepia with handpainted color

Technique: Applying painted background texture

I hope you liked the pictures.  Comments are always welcome so let me know what you think. 

Thanks for stopping by and come back soon.

Friday, October 29, 2010

What's new at The Loft - Episode 36

New Susan Tuttle class Ghostly Figures

I've just finished up another class with Susan Tuttle called "Ghostly Figures".  I've taken several classes with Susan already and she is such a great teacher and I have learned so much from her.  Here are some photos that I created for the class.


"Evil Clown" - Doesn't he look creepy!

"Lady Waiting for the Train"


"London Fog" - Our assignment was to create artificial fog, so I used this night picture I took from the England pavilion at Epcot to try my hand at it.


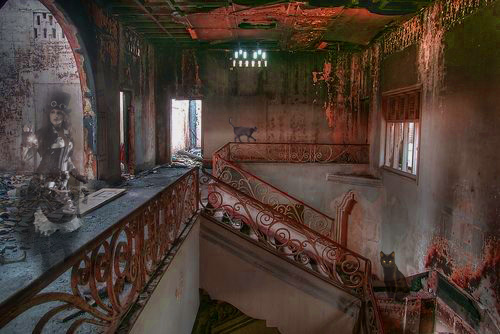
"Ghostly Girl with Cats"

"Forgotten Man"

"The Shadow in the Window"


"Ghosts of the 4th of July"  - This is a great straight out of the camera photo I took on the 4th of July.  I was playing with long exposures and caught this great shot of some people walking on my street in a ghostly haze of the firework smoke.


ATC 3.6.5. Challenge

*** Disclaimer on digital ATC cards***. Most, but not all of the digital ATC's here were done with images found openly on the Internet for my own personal enjoyment. I do not own the photos and they have not been reproduced or sold in anyway.

It's hard to believe that on 9/6 the first card shown here I had already made 249 cards this year, but there is still 116 to go.

9/6 "The Ocean"  - I grew up on Lake Erie, literally.  My parents had a house on the beach and when I was younger that's where I could be found most of the time.  Strangely though when I moved to Florida in 1996 I have only been to the beach a handful of times, and I have only been to the beach once on the west coast of Florida where I live.  Our favorite place to go is for a vacation to Vero Beach on the East coast of Florida.  We all love going there just to relax and unwind, and reconnect as a family.    This year we are trying something different by going to Vero Beach for Christmas.  The Image and background for today's card was from an Urban Outfitters catalog.  The journaling was done with a white fine point sharpie poster paint pen.


9/7 "Bored to Tears" - I really loved this picture and the expression on the girls face so I had to use it in this digital card.


9/8 "Peace" - The background was painted with red Liquitex Basics acrylic paint, then stamped on with Black Staz on, and embellished with a white Sharpie Poster Paint pen.


9/9 "Winter Bride" - A digital card created starting with an image of a bride and overlayed with several texture layers.


9/10" Vintage 1908" - My version of going green has combined this vintage image of children with modern packaging for soup.


9/11 "Dream" - A fun little banner for such a sad day using paper scraps, and ric-rac.


9/12 "Holly Short" -  a digital creation which is my representation of a character from a children's book I love called Artemis Fowl. 

9/13 "Queen" - This is my first attempt at a steam punk ATC and I love the way it turned out.  I used some glitter paper for the background and the image was of a Ziegfeld girl I pulled off the Internet.  I then embellished the card metal jewelry findings, and wire along with typewriter sticker letters.


9/14 "Paint explosion" - A card made of bleached muslin used as an experiment in color.  Before adhering the muslin to the card several drops of color were put on the plain muslin, then rolled and flattened.
A messy but very fun card to make.


9/15 "Venus" - Another fun card made using an image of the lady in the Clam shell, embellished with different buttons with the shanks cut off and a small square mirror strategically placed.


Well that's all I have for today.  Comments are always welcome and appreciated so please feel free to drop me a line.  Thanks for stopping by and come back soon.

Friday, June 18, 2010

What's new at The Loft - Episode 27

BUSY! BUSY! BUSY!

I have been so busy as of late that my "fun" time has been full of playing catch up for my new Photoshop class with Susan Tuttle on Digital Layers.  Susan is such a great teacher, and I'm learning so much. 

Here are just some examples of the work I'm done for this class.  I apologize for the poorer quality of the photos, I used a copy of a copy of the actual photo file.  To see larger images in better quality please visit my flickr page at www.flickr.com/photos/loftonfallingstar/.


HAVE I MENTIONED IT WAS HOT AROUND HERE!!!

Outside right now the temperature is 91 degrees but the heat index is making it feel like 104 degrees. That's too hot even for us here in Central Florida at this time of year, and my electric bill from running my AC 24/7 is proof of it.  If it's like this in June, it will be really bad in August.  YUCK!

ATC 3.6.5. Challenge

Still going strong on the challenge and I have been really trying to push myself to try different things so I hope you like what you see. 

6/1 "A Woman's Purse"  Anyone who knows me knows that I carry a large purse that pretty much has everything but the kitchen sink in it.  I get so many comments on it that it is funny, especially when I complain about how heavy it is.  I'm frequently asked what I have in it, or why do I carry all the stuff I carry.  All I can say is that I have what I need and feel lost if I take something out.  So there you have it and in honor of that theme I created this cute "purse" card.  The purse is hinged with a small white cardstock strip folded and glued to each side and opens downward actually opens downward, and is held closed when up by tiny Velcro tab.  I created the purse front out of some white cardstock that I covered in the animal print fabric.  I then attached some metal distressed snaps with my Crop-O-Dile at the top.  I used a soft copper wire to make the purse handles and twist with pliers, and the inside card is lined with a textured blue paper to which I hand wrote a little note.  It reads "The contents of a woman's purse is always a mystery to a man".

6/2 ""Where My Heart is"  My inspiration for this card was these cute little house shaped paperclips I bought a long time ago but haven't used yet.  Keeping the house in mind then I went to my computer and printed out a map of my neighborhood and adhered it to a card blank so that the house clip would sit in the upper left corner of the card, right over where my actual house is.  I then trimmed the excess to fit the card.  Lastly wrote the title, then hand drew a slotted line to show a driving route and a heart around where my house sits on the map all using a black Zig marker. 

6/3 "A Woven Moment in Time"  My inspiration for this card actually came from 2 different places, a piece of artwork I found online and an online site that sells yarn but also carries weaving looms.  The concept here was to take a still photo (hence the "moment in time" part) cut it into strips, and then weave it (the "woven" part) together.  The artwork I saw had used a photograph which was cut into strips and then small pieces of the similar parts of the photograph were woven into a geometric shape, that was adhere on top of the piece.  For example, they took a photo of 3 flowers, one red, one purple,and one yellow.  They cut the photo into strips and then on a larger substrate they took all the strips of the purple flower and had woven them into a square shape.  The results were and intriguing dimensional embellishment.  So I took a fairly large magazine photo (approx. 5x7 in) and cut it into strips, and began to lay out the strips to try and align them so that the similar colors or patterns of the original photo would be grouped together.  Since I was going for the whole card being woven I ran into a few problems.  The first of which was that the magazine photo was not large enough when cut into strips to be able to do much color or pattern matching.  The second of which was that with a background this small, to weave any kind of shapes you would need thinner strips or more nimble fingers.  I let my frustration (and the late hour) win out and I settled for a plain weave, with no pattern or color matching, and even though it wasn't what I intended when I started I actually liked it in the end.  The mix of colors and patterns works well, and adds to the visual interest, and reminds me of those photo puzzles where the overall image is made up of dozens of smaller images.

6/4 "What's On Tonight" I have this great book on making interactive scrapbook pages which inspired me to make this spinner card.  Spinner cards while easy to assemble, are not necessarily easy to design.  Your images have to be precise to fit in the window so you can see the changing images.  My inspiration in doing the spinner card came from listening to my two daughters discussing what to watch on TV.  They have a large age gap between them (6 1/2 years) which can sometimes cause conflict when it comes to what they watch.  So the basic concept for the card was create a spinner card on channel surfing.  So I took some brown paper and drew a  small TV and cut out the screen.  I adhered this on white cardstock, cut to ATC card size and then cut the screen space out of the white cardstock.  I then drew the antenna and dials on the TV with a silver marker, and outlined in a black Zig marker. I then hand wrote the title, and cut out an arched notch at the bottom of the card for access to the spinner.  The spinner which sits underneath the white cardstock is a large circle which is divided into 4 even sections and is attached to the card blank with a small brad.  It features 4 different images and/or TV logos.  The images and logos were taken off the Internet and reduced in size (my husband was a sweetheart and did this for me).  Each image was adhered into one of the sections on the round spinner.  Sounds easy doesn't it, but it really wasn't.  With the TV screen being square and the TV images being rectangular this created all sorts of problems with sizing every time you turned the wheel.  After a lot of maneuvering and trimming I managed to get each image to fit and look halfway decent not only as it was turned, but how it looked when it ended up in the TV screen.  Once this was done, I put very small amounts of glue in each of the 4 corners of the top card and base card, being careful not to get it on the spinner, or anywhere where the spinner would lay.  For those of you interested when you flip through the channels on this TV (by moving the spinner wheel at the bottom)  you have a choice between Burn Notice, Lost, The Simpson's, and The Family Guy.  Overall I was happy with this card, but if given the chance to do again I would have dressed up the front more, and added some typed text instead of handwriting it.

6/5 "ATC Doll"  I have to admit that my inspiration for this card was actually a copied idea I saw in a Somerset Studios magazine.  An  ATC doll was such a cute concept that I had to try one.  And even though I really like what I had done here, I would have changed a few things, like using brighter colors and different patterns for the papers  The papers for the arms and legs were actually tags from 7 Gypsies, along with the hand in the center.  The arms with inked along the edges in red using a Color Box Cat's eye ink pad, and the legs were edged with Distress ink in walnut.  The bingo card was from Jenni Bowlin which was distressed with some Tsukineko chalk ink in turquoise.  The head was cut from some Tweety Jill collage paper, which was adhered onto the neck piece cut from a 7 Gypsies tag.  All movable parts were punched with a Crop-O-Dile, and joined with small brads.


6/6 "A Little Bird Told Me"  An altered art piece featuring a nest cut from pages from a book was the inspiration for this card.  I really loved the nest of words idea and wanted to do something similar.  I started by taking a card blank and coloring most of the back in light blue, with a small strip of brown at the bottom using my Neo II watercolor crayons.  While drying I found this cute bird in a 7 gypsies tag pack and colored it red with the same watercolor crayons.  On my computer I found as many quotes as I could find that was bird related and printed them out on a beige cardstock, cutting them into small strips.  I distressed the edges and the surface with tea stain Distress Ink. I then built my nest by first putting a strip on each side and laying then at upwards angles and then laid a strip over the top. Then another strip on each side angled, and then one on top.  The side strips were of course too long so they were cut and were placed at random on top of other strips.  My goal was to stack them to make it look like a nest but also be able to read some of the bird quotes.  Before they were dry I lifted one of the top horizontal strips and glued the bird underneath the strip to lend to the illusion that the bird was actually in the nest and not appearing to sit on top of the nest.  I then used a purple metallic Gelly Roll pen and traced along the wing doodle that was already on the bird.  Lastly I drew an eye on the bird using a white Uniball "Signo" pen and a black Zig marker.

6/7 "The Apparition"   My inspiration for this card came from a technique I was trying called a gel skin.  I started this card by taking a black and white laser jet image and applying at least 3 coats of Liquitex gloss gel medium to the image, letting it dry thoroughly between each coat. While each coat was drying I created the background on a card blank.  I started by tearing small pieces of the pages of an old telephone book and gluing them down randomly on the card, so that not all the text was facing in the same direction.  When still slightly tacky I applied random areas of red and orange acrylic paint using my Adirondack paint dabbers.  When dabbing with the paint dabber, the tackiness actually lifted up parts of the paper underneath, so I went with it and tore them away, leaving the raw phone book page underneath.  When the paint was dry I went back over the whole background again lightly smudging some white acrylic paint on with a dabber.  This gave the back a more marbleized look.  While this was drying I went back to my image covered in gel medium.  I detail cut the image out then turned it over and applied warm water with a paint brush.  (you can use a small mister with warm water, which I have tried many times in the past.  It works well, but the brush worked better in this case)  With the white paper saturated, I began to rub away all of the white paper back until all you are left with is a semi transparent image transferred to a gel "skin" which the built up layers of gel medium created.   This "skin" was then glued on top of the background , so you could see the paint and the phone book pages through it.

Note: A gel skin is different from a gel medium image transfer in that with a transfer you are generally transferring an image from one substrate to another.  A gel skin is a image transferred onto a new physical form like a "skin", which is a rubbery, flexible transparency.


Well I have lots more to show and tell, but this post is getting long, so I will end for today.  Come back soon as I have lots more to show.  And coming up DIGITAL WEEK!!!.  All digital ATC's every day for a week.  I've done 5 so far and I'm loving it.  It's also had the gears in my head turning on other theme weeks we can do, and some other mixed media pieces I can do.  I'm very excited so I hope you come back soon to check out all the fun. 

I really love comments so please drop me a line .  Tell me what you like or don't like, share your ideas, or suggestions for improvements or other tips and techniques to try.  I'm open to anything and love feedback so don't be shy. 

Thanks again for stopping by!!!