Tampa Bay Scrapbooking Guild
Our March General Guild meeting was a lot of fun. Our guest speaker Nancy Nally from Scrapbook Update gave an interesting and entertaining talk about the upcoming trends in the scrapbooking business. It was a pleasure to meet Nancy and learn about what we have to look forward to in the scrabooking world.
Here are some pictures from the event.
And here's a picture of me with Nancy
Sticker packs from San Diego
Last post I made mention of these great sticker packs my husband brought back for me after a business trip in San Diego. He is such a great guy, and I love how he wanted to bring me back something that he knew I could use in my projects, whether it be ATC's, scrapbooks or mixed media. There were four different packs he brought home, vintage perfume labels, 2 sets of travel stickers, and an assortment of postage labels. Here are some samples of the labels.
ATC 3.6.5. challenge

My card from 3/26 was called "Love" and was made by cutting a background from Tweety Jill's "Retro Rooster" paper pack, and stamping a love stamp on it with black ink. Next I took white Liquitex "Basics" paint and dry brushed it lightly over the stamp. I then took a ColorBox "Cat's Eye" ink pad and lightly smudged the color in some areas. I then detail cut the image of the girl from my Tweety Jill "Vintage Photographs" collage pack and adhered her to the center of the card. To bring out the letters in the word love, I outlined them using a white Uniball pen, and then doodled some dots inside the outline with a green Zig chalk marker. Using turquoise Tsukineko chalk ink I stamped the flourish on the right side of the card, and then decorated that stamp by doodling dots with the white Uniball marker, and added some purple rhinestones. I also added some additional bling by gluing a green glitter heart charm on the right side. Lastly I added some color to the flower in the girls' hair with a rose star Gelly Roll pen.

My card from 3/27 is called "Alice's Adventures, and was made using images cut from the Tweety Jill's "Alice in Wonderland" collage pack, and used a playing card for this background to match the theme. Next I cut the spine of the book and glued it to the left side of the card. I then cut the story text and glued it in the center of the card. I used Color Box's "Cat's Eye" inks in yellow and green and smudged it along the surface of the card. I next detail cut the image of Alice and glued her on top of the story text but aligned to the right side. Next I cut the image of the playing card and glued it down at an angle on the upper left hand corner. I then detail cut the image of the Queen of Hearts and adhered her on top of the playing card with pop up dots. Lastly I cut off the shank of a rabbit button and glued it to the bottom left hand corner of the card.

My card from 3/28 is called "Time Flies". For this card I started with a piece of text paper from Tweety Jills collage paper pack. and using a bird stencil I took Tsukineko chalk ink in Turquoise and applied the color around the edges of the stencil. I then outlined the image of the bird with a black Zig marker. I then detail cut the image of the girl from the Tweety Jill "Vintage Photograph" collage pack and glued her to the center of the bird. I then added a little more color by applying some yellow ink from my Colorbox "Cats Eye" ink along the outer edges of the card. Lastly I stamped the title using black ink.

My card from 3/29 is untitled and was created by printing an Asian background on black and white laser printer. The whole background image was then colored in using Crayola watercolor pencils, and then applying water lightly with an H20 brush. Next I stamped on white paper and detail cut the image of the Geisha, afterwards I used water color pencils on that as well. I glued the Geisha to the bottom left of the card, and then stamped the pagoda next to her in black ink. I then detail cut the image of the lucky cat that I had gotten off the internet. Lastly I stamped the Asian characters in black ink at the top right hand side of the card. Lastly I doodled all over the card with a white Uniball pen.
My card from 3/30 is called "Italia". I made this card by cutting a background from a Italy daily desk calendar and adhered it to the background with some Tombow glue stick. Next I used a black Zig marker to re-draw some of the lines of the buildings, to make them more prominent. I then used a white Uniball pen and doodled some clouds and made a dotted edge. I then took a clear sticker with the word Italia and aligned it along the left edge of the card.

My card from 3/31 is called "Perfect". I started by making this card by printing an old Hollywood photograph from the internet and using it as a background. Using Koh-I-Noor watercolor wheel I painted the dress of the woman. I then used my Stencil Collection chalks and added flesh tone to the skin and light blue to the fan. I then cut out the side slotted pieces of a die cut film strip and adhered it to the right side of the card. I then took a clear star Gelly Roll pen and added some sparkle to the dress, parts of the fan and the film strip. I then used a blue star Gelly Roll pen and added some bling to the top of the fan, colored in the tiara and shoes of the lady. Next I added a line of tiny pearls the the bottom of the fan. I then colored in some of the fan's blades at the womans hands with a white Uniball pen. I then used Tsukineko chalk ink in turquoise and lightly smeared it to the background to add a little color. Lastly I used a rub on for the title and applied it to the top of the card.
My card from 4/1 is called "Bieres de la Muese" and was made using a playing card for a base this time. I then cut a strip of blue polka dotted paper and glued it diagonally across the card. Next I stamped the background paper and part of the card with a sheet music stamp in black ink. I then detail cut the image of the clock from a card collage pack I had laying around, and glued it down on the top right hand edge of the card. The woman was then detail cut from my Tweety Jill "Fashion" collage pack and adhered her to the left hand side of the card. Lastly I cut the title from the same image as the woman and cut it into pieces gluing them in different spots on the card.

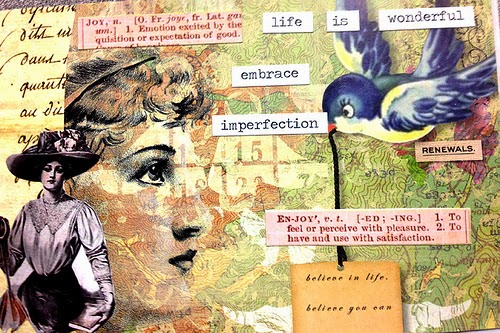
My card from 4/2 is called "What Lies Within Us" and was made by cutting a background from a free sample of artist paper printing in Somerset Memories and adhering it to the card.. I then inked the edges using Tsukineko chalk ink in turquoise. I then detail cut the image of the girl from the Tweety Jill "Vintage Photographs" collage pack and glued her at the bottom of the card. Next I cut the title from a 12 x 12 sheet of scrapbooking paper covered in quotes. I lastly embellished the card a little further with a few rub on flowers from Bo Bunny.
ATC 3.6.5. Challenge for vacation week
The family and I are going away for Easter this year so I hope to be able to send some posts from beautiful Charleston, South Carolina. I still will be making my card per day but to challenge myself further I've decided to take only a minimal of basic supplies and make may cards with things I find along the way during our time in Charleston. The basic supplies I will be taking are:
a 8 pack Crayola watercolor pencil set
a black Zig marker
a Tombow glue stick
Bumble Bee detail cut scissors
an H20 water brush
a white Uniball pen
a Clear Star Gelly Roll Pen
an Adirondack white acrylic paint dabber
pop up dots
Tsukineko chalk ink in turquoise, midnight blue and barn red
and some ATC card blanks
I'm looking forward to the challenge, but a little nervous about it so wish me luck!
Well that's all I have for today. Hopefully the next time I post will be from beautiful Charleston. As always your comments are welcome so please feel free to drop me a line and tell me what you think. Thanks for stopping by and come back soon.