Update on our technical issues. For followers, past postings and other blogs I follow please scroll down to the bottom with your elevator bar. The right sidebars are there but are still appearing very far down the page. We are still hoping to get this issue resolved soon. Thanks again for your patience.
REMINDER: The Tampa Bay Scrapbooking Guild is having it's first general meeting on February 23rd at the Milk & Honey Tea Room, 2092 Busch Blvd., Tampa, FL 33612. We are very happy to have Jill Haglund, CEO and Creative Director of Tweety Jill Publications as the speaker for our inaugural event. The meeting is from 7 - 8:30 PM and costs $5.00. There will door prizes, show & tell and much more. Any one interested can reserve their spot by calling 813-404-5165 or by visiting www.tampabayscrapbookingguild.com.
To check out some of Jill Haglund's work please visit http://www.tweetyjill.com
ATC 3.6.5 Challenge Update:
Ok, so I got a little behind on my postings due to the redecoration project in daughter #1's room. I apologize, but I've still been good about keeping up with the card per day. Here are the cards from the days from the last posting until today.
The card from 1/28 is called "To Be Free". To make this card I cut out some script background from Tweety Jill collage paper. I then piece cut the bird cage from some beautiful Webster's Pages paper and glued on top of the background. For the bird, I stamped him onto a scrap of light blue patterned paper, piece cut him out and then glued him on the top left of the cage. I then chose the letters from the My Little Shoebox mini alpha stickers i have, and placed them at the top left of the card.
For the card I completed on 1/29 entitled "Singular Sensation", I started with a background cut from some Webster's Pages paper, also piece cutting the clock from the same paper, and glued it to the background, I then cut the image of the woman from my Tweety Jill collage pack, and adhered her to the background, having her overlap the clock just a little. Next I piece cut the butterfly from a sheet of Webster's Pages paper and adhered it to the top of the card with a thin pop up dot. Next I cut out the title from some scrap patterned paper and glued in the bottom right hand corner.
For the card I made on 1/30 entitled "Wicked Little Angel" I started with a scrap of patterned paper, and then piece cut the little girl. I stamped some wings on some scrap white paper, and I piece cut them out. Before gluing them onto the back of the girl, I highlighted them in with a clear star Gelly Roll pen. I then glued the entire image of the girl with wings onto the background. With a white uniball pen, I wrote the title and decorated the two upper corners with doodles.
The card I created on 1/31 is called "Exposition D'Art". In creating this card, I started out by stamping the background with a text stamp. From some Tweety Jill collage paper I cut a strip of pink swirled paper and scalloped the edge. I then lightly applied some white paint to the pink strip. Over the text I added a little color by applying some blue and green chalk from my Stencil collection pastels. I then cut an image from my Tweety Jill collage pack and adhered it to the background. I then piece cut the two butterflies from a piece of Webster's Pages vellum and adhered them to the card with some thin pop up dots. To decorate the flowers in the image, I cut thin strips of bright pink tissue paper and rolled them up. I then crushed them down a bit and glued them in place with some Tombow glue.
What I've Completed
Here's a few cards I recently made for daughter #1's birthday.
I really like to make cards. They are fun, and I really love the expressions on my daughters faces when they see what I've created just for them.
Well I hope you have enjoyed. I will be starting my Photomanipulation class with Susan Tuttle tomorrow so I will be posting on my progress, and the progress we are making on our redecoration project.
Thanks for stopping by and come back soon!
Sunday, January 31, 2010
Thursday, January 28, 2010
What's new at The Loft Ep. 2
Update on our technical issues. Well we've made some progress. All of the right sidebar sections have returned however you have to scroll down very far to see them. Still working on the issue though to get it back to normal. Hopefully it will be fixed real soon. Thanks again for your patience.
REMINDER: The Tampa Bay Scrapbooking Guild is having it's first general meeting on February 23rd at the Milk & Honey Tea Room, 2092 Busch Blvd., Tampa, FL 33612. We are very happy to have Jill Haglund, CEO and Creative Director of Tweety Jill Publications as the speaker for our inaugural event. The meeting is from 7 - 8:30 PM and costs $5.00. There will door prizes, show & tell and much more. Any one interested can reserve their spot by calling 813-404-5165 or by visiting www.tampabayscrapbookingguild.com.
To check out some of Jill Haglund's work please visit http://www.tweetyjill.com
ATC 3.6.5 Challenge Update:
Jan. 27th's card is called "Melancholy Lady". For this card I tried something a little different. I started out by using Gel Medium to adhere some raw unprimed canvas to my card. I then stamped the image of the woman onto the canvas with black Staz On ink. To color in the image of the woman I used my Stencil Collection pastel chalks. The green border was done with Neo II watercolor crayons. Once the watercolor was dry I used a needle to remove some of the fibers from the ends, to give it a frayed look.
What I'm working on now:
I've recently discovered loom knitting and am really loving it. For those of you who have never tried it, here's a picture of what my loom looks like. I have never knitted before in my life and was surprised at how easy and fun it is. I love to sit in front of the television at night and do this. These looms made by Provocraft are called "Knifty Knitters" and they come in different sized rectangle and round shapes. The one I use is a 24 peg rectangle loom, which retails for around $8.00, but I got mine on sale for $4.00.
I had some brown yarn sitting around that I used to try and get the hang of how to knit with this, and I was surprised at how easy it was. I'm sometimes not good with written directions so after reading these I wasn't confident I was doing this correctly. I found some videos on You Tube and to my amazement I was doing it right. So I went to the store and bought some yarn so I could make something fun. I bought this red Lion brand Fun Fur to try and make a scarf with.
Just looking at this yarn would make you think that even an experienced knitter my find working with it a challenge, but I was really impressed at how easy it was to knit with it. Before I knew it I had completed my first scarf.
Unfortunately with my schedule I can't sit and knit a scarf in one sitting, but when I added up the total amount of time I actually worked on this I figured it took me around 4 hours to complete it.
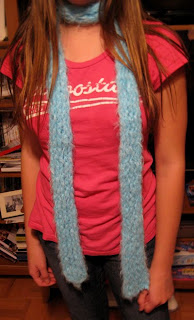
Once I finished the first I was eager to make another so I went out and bought some thicker yarn and this one was even quicker to make. I finished this blue one in about 3 1/2 hours.
Both of these scarves are a little over 5 feet long and were knitted on only 5 pegs up on both sides. However, one thing I noticed is that once the scarf gets longer the weight pulls it down and they get skinnier in the middle. So on the newest one I'm working on I am knitting on 6 pegs up both sides. Again I'm using fun fur, but this one is a little more of a challenge due to the multiple colors in the yarn. This one is a mix of beige, light yellow, moss green and a sort of coppery brown. I have been working on this one intermittently for 2 days (about 2 hours total so far) and by the end of my lunch hour today I was a little shy of 3 feet.
I've got some new ideas churning in my head so I'm hoping to try some of those out this weekend before I start my Photomanipulation class with Susan Tuttle on Monday. I'll have to sandwich that in between the redecoration project in daughter #1's room. It's going to be a very busy weekend but should be lots of fun.
Thanks for stopping by and I hope you come back soon!
Labels:
ATC 3.6.5. Challenge,
loom knitting
Wednesday, January 27, 2010
What's new at The Loft Ep. 1
Welcome back!
Firstly I must apologize - There seems to be a technical issue with my blog where not all of the sections on the right are showing up and for some viewers it is very slow in loading. I am aware of the issue and it's being worked on, so I thank you in advance for your patience while we get it worked out.
Here's what's new: The Tampa Bay Scrapbooking Guild is having it's first general meeting on February 23rd at the Milk & Honey Tea Room, 2092 Busch Blvd., Tampa, FL 33612. We are very happy to have Jill Haglund, CEO and Creative Director of Tweety Jill Publications as the speaker for our inaugural event. The meeting is from 7 - 8:30 PM and costs $5.00. There will door prizes, show & tell and much more. Any one interested can reserve their spot by calling 813-404-5165 or by visiting www.tampabayscrapbookingguild.com.
I'm really looking very forward to this event and meeting Jill in person since I use images from her collage sheets so much.
I'm also really excited to be starting Susan Tuttle's Photomanipulation 2 class beginning Feb. 1. You can check out Susan's blog at http://www.ilkasattic.blogspot.com
Susan is so talented and I am really looking forward to her class. Over the course of this month long class I will be posting my thoughts and experiences here, along with some of the results of what I've learned. I can't wait to get started!
ATC 3.6.5. Challenge Update: Ok so here's the card for 1/26 called "Love". To make this card I started with some sheet music paper from Jenni Bowlen that I adhered to the card. To give the paper an aged look I brushed lemon juice on it and used my Ranger heat tool, heating the paper until it started to turn brown. I printed the image of the woman on a laser printer and detail cut her. Using my Stencil Collection pastels I then colored the woman in, and adhered her on top of the background. For a little bling I lightly applied some green Stickles to the flowers in her hand, which unfortunately didn't carry over very well to the photograph. I then cut the title out of my wedding ATC paper pack and used thin pop up dots to adhere it to the card.
Here's something new I've completed:
I was playing with inchies not very long ago, and put together this mosiac that was stamped and painted with Crayola watercolor pencils. It's not your typical inchie project, but I liked the tile affect. How neat would this look if I did the same thing only used some transparencies, Staz On and alcohol ink for a stained glass window in a dollhouse! Dollhouses and miniatures are another one of my passions and am always looking for ways to reproduce life sized things into 1" scale.
What I'm working on right now:
My hubby and I are in the process of redecorating our oldest daughters' room, so I'm putting together this wall hanging for her. As a base I'm using a canvas board that I painted gray and have incorporated the new color scheme by creating a mosaic of different paper, various sizes of Tim Holtz Grungeboard letters that spell her name, and other little embellishments. It's still a work in progress but coming along nicely I think. I'll keep updated on the progress of the room, and post pictures of the completed wall hanging when it's finished. Right now my husband is doing the messy job of removing wall paper from the walls. It's a slow process but it puts us one step closer to the fun stuff like painting, new furniture and other decor.
A little tidbit about me:
I'm the type of person that I can only look at a project for so long before I have to move on. I have a large pile started projects, and a very slow growing pile of completed projects. I find that if I focus too long on one project my frustration sets in and instead of just settling for what I can slap together, I walk away from it, and then come back to complete it. I'm too much of a perfectionist I guess when it comes to my projects. Frustration kills my creative process though, so for me moving on to something else usually helps a lot. I hope that this blog will not only inform and educate those who read it but inspire me to move ahead with some projects of mine that have been sitting in the incomplete bin for a while.
As always your comments are appreciated so please feel free to send them. Thanks for visiting today and come back soon!
Labels:
ATC 3.6.5. Challenge,
inchies
Tuesday, January 26, 2010
ATC 3.6.5. Round 8
Greetings from The Loft
Welcome back! Yippee, with this post I am caught up on my posting of the ATC cards I have completed so far in January. My work process is that I generally do my ATC's at night (I work full time so this is usually my only chance to work on them), so from now on new ATC's for the day will be posted the next day. So tomorrow I will post only the card from the 26th, and move on to some new things.
So here we go, on to Round 8. The first card I've posted today is from 1/23 and is called "So in Love". To create this card, I cut the background out of some great Webster's Pages vellum and glued it to the card. I then detail cut the figure of the lady from my great Tweety Jill collage pack, and glued her down on top. I then cut out the words from some Theresa Collins paper and adhered them to the top of the card. I love this vellum and had to go back and purchase several more sheets of it.
My card from 1/24 is called "Night on the Town." I was flipping through a fashion magazine one night and came across an advertisement with these skyscrapers at night and immediately ripped it out of the magazine. A light bulb went off and it became my inspiration for the ATC. The ad was really big so I chose which part I wanted for the background on my ATC, and trimmed it down. After I glued the skyscraper background to my card I then detail cut the image of the dancing couple from my Tweety Jill collage pack and glued it on top of the background. I then finished off the card by taking some white paint from my Adirondack paint dabber and applying it with a Q tip to the outer edges of the card in a dabbing motion, to draw the eye more to the center of the card.
My last card to post for today is from 1/25 and is called "Fly". To create this card I used a piece of artist paper that was part of a free sample from Somerset Memories magazine. I trimmed the paper to fit the card and glued it down. Next I detail cut a woman from my Tweety Jill collage pack. I then detail cut a butterfly from my Tweety Jill collage paper. I glued the butterfly to the back of the woman to give her wings and then glued the whole thing down to the background. Next I stamped the word Fly at the top of the card.
I'm very happy to finally be caught up with the cards now, so I can go on to post one per day and begin showing you what else I have been working on lately. Can't wait to start showing some new things. As always your comments are welcome, so feel free to post them. Thanks again for stopping by and I hope you come back soon!
Labels:
ATC 3.6.5. Challenge
Monday, January 25, 2010
ATC 3.6.5. Round 7
Welcome to The Loft!
Greetings and welcome back. Wow up to Round 7 and happily almost caught up to date on my ATC 3.6.5 challenge. I have been faithfully completing my card a day, but posting them has taken a little longer.
So moving on to Round 7, the first card is from 1/20 and is entitled "Lady in a Feather Hat". This one has become my new favorite so far. I'm so happy with the way it turned out. So create this card I started with a piece of blue and white diamond paper from Jenni Bowlin. I then took an image from my Tweety Jill vintage collage sheets, and detail cut the lovely lady in the photo. I then adhered the image on top of the background paper. Next I took a white coffee filter that I had glimmer misted in Vintage Pink , and cut it into small thin stips, approximately 8 strips total. (Note, tissue paper would have worked here too, but I had already been making coffee filter flowers and I had one left over so I decided to use it here.) I then began rolling the strips into a cone shape. This is not easy to do since the strips are very small but tweezers can help. Once I had the first one rolled, I pressed it and scrunched it down. I then put a small amount of the white Tombow glue on it, and held it to the top of the ladies hat with some tweezers. I did this 7 more times until there was a good part of the hat's brim covered. Next I glued two feathers to the top of the hat, that fan out over the top of the card. The photo doesn't do it justice, but it was late when I took this picture and was getting impatient to post it. Sorry about the picture quality.
My next card from 1/21 is called "Downtown Diva" and was made using a neat watercolor image I cut from a magazine, that I placed on top of some cute polka dotted Jenni Bowlin paper. I then used a Jolee 3d sticker of the Empire State Building and my white Uniball pen to handwrite my title to finish the card.
My last card for this post if from 1/22 and is called the Queen. Once again for the background I used some Jenni Bowlin paper, and a laser printed image of Clara Bow. I topped it off with a little crown, and used some magenta stickles on the points of it. It wasn't one of my better cards, but I had a crafters night that night and wanted to work on some other projects while I was there.
Well I hope you like the cards for today. As always please feel free to post your comments. Thanks for stopping by and come back soon!
Labels:
ATC 3.6.5. Challenge
Saturday, January 23, 2010
ATC 3.6.5. Round 6
Greetings from The Loft
Welcome back! I'm getting really close to being caught up on posting the cards I have completed for January so far. So on to the cards
Next in order comes my card from 1/17 entitled "Little Girl" and was created using a laser printed black and white vintage photo that has been colored with my awesome Stencil Collection pastel chalk and a little Gelly Roll metallic pen. I then cut a frame out of some Tweety Jill collage paper and created a faux stitch around the inner edge with a black fine tip marker.
The card I created for 1/18 is called "The Proposal". For this card I chalked the background yellow, and then used some photos from a bridal magazine to create the theme. I overlapped the photos a little because the girls hair was weird. The titles were also cut from the same magazine, except for "the ring" which I wrote with a blue Zig marker. This was a really simple card to make.
The last card I am posting for today was created 1/19 and is entitled "Be Mine". I'm obviously not thinking of keeping in turn with the various seasons and holidays, so I guess I will need to pay more attention to that in the future.
Moving on, I actually was inspired to create this card while I was going through the drawers of our coffee table and came across this word search from a book my daughter got from school on recyclying. I thought the idea of using a word search for a background was a great idea, until I couldn't actually find any words besides those related to recycling. Words like cardboard, paper and glass were not inspiring me as far as making an ATC, but as luck would have it I found be & mine right in the same area, and an idea formed. I then found the photo of the couple in a bridal magazine, and placed on the card just to the right of the title. I then stamped a small heart on white paper, and then crumpled it to distress it. It was then sprayed with candy apple Glimmer Mist and dried with a heat tool. I then wrote the word Love with a black Zig marker, and I adhered the heart with two way glue. Lastly I circled the words be and mine in a red Zig marker.
Well that's all I have today. I hope you like. Your comments are always welcome, so please feel free to share them. Thanks for stopping by and come back soon!
Labels:
ATC 3.6.5. Challenge
Friday, January 22, 2010
ATC 3.6.5. Round 5
Welcome to The Loft
Welcome back. Ok here we go again, my 5th entry on ATC card's for this month.
My card from 1/14 is called "Imagine" and was simply done. I stamped on the card with a Heidi Swapp stamp, and then added different colored dots with Crayola watercolor pencils, applying only a small amount of water to each. I then dry brushed some fired brick distress ink to the background.
My card from 1/15 is called "Flower Girl", and was created by applying a light blue pastel chalk from Then Stencil Collection to the background and then I stamped on top using a Tim Holtz stamp. I then chose a vintage image from my Tweety Jill collage pack and tore the edges to distress it. The edges of the image were then inked with walnut stain disress ink. I then glued the image down on the card, and topped it off with a We R Memory Keepers Gromlet.
My last card for today's post from 1/16 is called "Winter Angel". For this card I first stamped the tree made by Heartfelt Creations with green ink twice on a separate piece of white cardstock. I then detail cut these, and glued down to my ATC card, makeing sure the bottoms of the trees overlapped slightly. I then turned over the card and trimmed them to fit the edge of the card. I next stamped the doll and wings (sorry I don't remember who made the stamp right now)on white cardstock. I detail cut these as well. I then glued the wings on the back of the doll, and colored with a clear star Gelly Roll pen, and the doll was colored using my awesome pastel chalks again. I then heat embossed the headband with silver embossing powder. The dress was cut from a light blue metallic paper, and topped with mini pearls and then glued to the doll. Once the doll was done I adhered her to the card with thin pop up dots. After the doll was affixed to the card I added some rock candy Stickles to the trees and spread it around with my finger for a little texture, and then did the same with an even smaller amount of stardust Stickles for shimmer.
I really hope you like the cards. Thanks for stopping by and come back soon!
Labels:
ATC 3.6.5. Challenge
Thursday, January 21, 2010
ATC 3.6.5 Round 4
Greetings from The Loft Hello again and welcome back! I'm on my way to getting up to date with posting all the ATC's done for this month so that I can finally start blogging about other things I'm working on. One thing I haven't really menioned thus far is that all the cards I've done have titles, so from now on I will start referring to the title of the card and the date created.
Onward then to the cards. My card from 1/11 is entitled Fractured and for this card I tried experimenting with a magazine photo, I have to admit this isn't one of my favorite ones, but I think in the future I may try this concept again and expand on it.
The card from 1/12 is called Geisha. I colored the background using fired brick and Faded Jeans distress ink, and then stamped the bamboo on top. The Geisha girl is a magazine photo, to which I then stamped the fan on top of that. After finishing this one it quickly became one of my favorites.
My card from 1/13 is called On the Stage. This was a more complex card to create. I used an image from some Tweety Jill vintage papers and adhered it to the card first. I then took this neat window with curtains stamp I purchased from Heartfelt creations and stamped it on red polka dot paper. I cut out the curtains and ran them through my Fiskars paper crimper, then stuck them to the sides of the card using pop up dots. I then tied some red fuzzy fibers to the middle of each curtain to add dimension to the curtain pulls. So far to date this card took the longest to create, mostly because the dimensions of the window stamp were too large for the card and I had to trim alot to get the right placement. The result was I think well worth the effort, and I love all the dimension and texture in this card.
I hope you like the cards. Feel free to post your comments. See ya next time!
Labels:
ATC 3.6.5. Challenge
Wednesday, January 20, 2010
ATC 3.6.5 Round 3
Greetings from the Loft! Have some more photos of cards I've done so far as part of my personal challenge to create one Artist Trading Card per day. Some days have been harder than others to create a card. If I have had a stressful day at work, I tend to struggle for ideas or inspiration to create that days' card. Other days the ideas flow more easily.
The card I created for 1/8 is on black paper for something a little different. I then took a an owl from Tattered Angels glimmer glass nature collection, and using a heat tool, warmed it so I could shape it more to give it dimension on the card. I then detailed the owl in Frosted Lace Stickles. I stamped and cut out two small clouds and outlined them in a clear star Gelly Roll pen, and then wrote the text in a white Uniball Signo pen.
1/9 I created a card using a vintage image from Tweety Jill and outlined the card in watercolor crayon. It was a simple card, but I thought the image really spoke for itself.
1/10's card was made using only the Wedding A.T.C. collection papers from Memories in the Making. I used walnut stain Distress Ink around the edges of the card, the title block and flowers to add to the aged look. I also used some thinner pop up dots to raise the title block and flowers for more dimension.
Hope you like the cards! Comments are appreciated so please feel free to post some.
Labels:
ATC 3.6.5. Challenge
Tuesday, January 19, 2010
A.T.C. 365 Round 2
Greetings from The Loft Welcome back! I've been keeping up with my resolution and still doing an ATC card a day, but have fallen behind a little on posting some new pictures. Have 3 more cards to share here.
The card from 1/5 is a laser photo copy of Clara Bow colored using gelly roll gel pens, and the white trim around the edge is done using a white uniball pen.
The card from 1/6 is another laser photo copy of a vintage image I found online. The color to the photo is applied with Crayola watercolor pencils, however the purple border is Neocolor II watercolor crayons. I love these watercolor crayons alot and the great range of color you can get from them. On top I applied a glossy gel medium in a swirl pattern for texture.
The card from 1/7 was an image cut from some Graphic 45 paper, and some paper that looked like a street map. On top I used a stamp from Tim Holtz. Once again I used some Stencil Collection pastel chalks along the outer edge of the card for a little color depth, and to draw more attention to the center of the card.
I hope you like.
Labels:
ATC 3.6.5. Challenge
Sunday, January 17, 2010
More ATC 3.6.5. Challenge photos
Greetings from The Loft! Welcome back. Finally finished dumping some more ATC cards from my camera so I can share them. The card from Jan 2, was done with some great Tweety Jill vintage image paper, Red Brick and Faded Jeans distress ink and Tim Holtz's new Rock Candy distress paint, to make it look more like an oil painting.
The card from Jan 3 I used a laser printed copy of a photo of Clara Bow and recolored with pastel chalks from The Stencil Collection, and some gelly roll pens. I absolutely love these chalks from The Stencil Collection and use them a lot. They are also great for coloring black & white glossy photos.
Jan 4th's card I used Candy Apple glimmer mist over a small glimmer screen, then removed the screen and glimmer misted with Red Velvet. I then stamped 3 small hearts on white paper, distressed it by crumpling it and sprayed them with Vintage Pink glimmer mist. I really love the way this one turned out.
Hope you like them. See you next time.
Labels:
ATC 3.6.5. Challenge
Thursday, January 14, 2010
ATC 3.6.5 Challenge
<Greetings from The Loft!
For the first time in my life I have made a New Year's resolution which is to make one ATC card a day throughout 2010. I'm calling it my ATC 3.6.5. Challenge. I know we are half way through January already but as my family can attest I have been keeping up with my resolution. For my first card of the year I wanted to do something very non-traditional and different, and as it happened it was reflective of what was I was doing on New Year's Day. My first card of the year is entitled Dalek because I was sitting in the living room watching an all day Dr. Who marathon.
One thing I should note is that I'm somewhat of a perfectionist, which at times gets in the way of the creative process so I have also resolved to do only one ATC card per day, and if I do not like the way it turned out, so be it. The important part for me is to create the card then if I don't like it, go back later and figure out what I didn't like about it and what I could do differently for another card.
I'm only posting the one for now but will share others in the near future, plus some ones I've created even before I started the challenge.
Hope you like!
Labels:
ATC 3.6.5. Challenge
Welcome to the Loft! It's my own little world of fun. But to start off I should probably tell you a bit about myself. I've never really thought of writing a blog before because I always felt I wasn't clever enough to have anything interesting to say, but I decided to take the plunge and write one anyways, and if no one reads it, that's ok too. But I am a creative person by nature and want to share that with others who like me, love to make things. I love the creative process, but my interests are varied. I love miniatures, dollhouses, scrapbooking, photography, altered art and mixed media art to just name a few (ATC's are my new passion and have resolved to make one per day in 2010).
I am a mom to two beautiful girls, and a wife to a wonderful supportive man who I have had the pleasure of calling my best friend for over 20 years. I love old classic movies, (I mean 30's 's & 40's, black and whites, not AMC's version of classics from the 80's & 90's), I love to read and cook when I have time and have the inclination. I am addicted to the Sims (Sims 2 is my fave, but just started playing Sims 3) and am an avid Dr. Who fan (love David Tennant, very sad he is gone). I love to listen to music and watch TV and have very eclectic taste. I love Disney and go as often as possible, so if you read my blog a lot you'll see a lot of "went to Disney".
My life in the last 2 years has taken what I think is a pretty dramatic turn, starting with the loss of my Step-Dad in August 08. He was an amazing person and so much more than just a parental figure to me, he was a good friend who taught me so much. But it was from this pain and grief that I re-evaluated my own life, and even though I was happy, I felt stagnate inside. I took a chance and ventured out of my comfort zone and new adventures and learning emerged. It started with an acrylic album scrapbooking class, and has blossomed into so much more. I've branched out into all sorts of directions and cannot believe how much I have learned in such a short time. I've met so many new creative people and made some great new friends (something I don't do easily) who inspire, encourage and challenge me to think in different ways.
My primary focus here will be to share what's new, what I'm working on and what I've been inspired by from others, plus maybe a few other things thrown in. I hope you enjoy it and come back soon! Thanks for reading.
Labels:
Introduction
Subscribe to:
Posts (Atom)